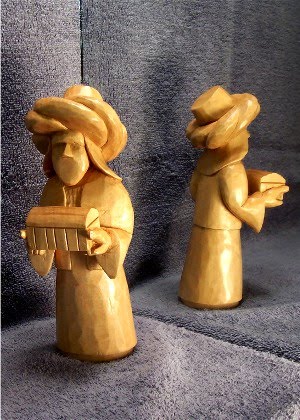
Thursday, September 16, 2010

What would you like to hear?

I've been looking at the information that I get from my "hit counter" and have found that not only do I have readers from all over the world but that some people spend a great deal of time looking at my blog.  Someone from Australia spent almost 15 minutes here yesterday!  Wow!

Now, I'm not complaining.  Far from it.  I am genuinely flattered that people want to spend time looking at my carvings and reading what I have written.

I understand that probably woodcarvers and woodcarver "want-a-bees" make up most of the readership.  My question to you, the readers, is: "What are you interesting in hearing about or in seeing?"  I'd love to make this blog really interesting to everyone.  So let me know what you are interested in.

One for the Bench:


Some people hear voices. Some people see invisible people. Tragically, many others have no imagination whatsoever.  


'Til next time, keep makin' chips!

Friday, September 3, 2010

Why Carve a Spoon?


I was sorting through some stuff that I have collected over the past few years and stumbled over this little piece.  I don't think that I wrote it, it doesn't sound like me, but I think that whoever did write it has experienced many of the same things that I experience when I carve.

Renewal - I can create something useful and beautiful from nature. It is a dance we do together. Making a spoon harms nothing and may actually add to the beauty in the world.

Joy - Carving is a joyful pleasure. It allows me to focus, frees my mind from abstraction, and strengthens my hands. The only person I can save is myself, and carving this spoon saves me.

Equality - Anyone can carve spoons.

Symbolism - This small wooden spoon and how it came from my hands is gentle encouragement to me of larger things I might be able to do.

Completeness - In carving a spoon I cut the block from the raw wood and watch the spoon emerge.

Friendship - I honor my friend each time I make a spoon. I only need a few spoons, so I can also honor other people by giving them away.

Democracy - There's orneriness in carving a spoon. It's my way of quietly but emphatically expressing my beliefs. A wooden spoon and plastic spoon say very different things.

Human expression - Each spoon I carve ends up unique. I hope the same for my life and yours.

Usefulness - Carving a spoon makes me be fully present. I listen better. I find that I need to say fewer things because my hands and mind are fruitfully at work. I can wait until my heart is pounding before I need to utter a word.

Humility - Yes, it does all these things for me but, in the end, it's just a wooden spoon.


One for the Bench: When tempted to fight fire with fire, remember that the Fire Department uses water. 

'Til next time, keep makin' chips

Thursday, September 2, 2010

My First "Dark" Spoon

Finally, here is one of the pieces that I have been holding off posting. The recipient has not yet received the spoon but she (to protect her anonymity, I'll call her "L") doesn't know (as yet) that this blog even exists so unless she is clairvoyant, I can talk about it here without worry. When her father (I'll call him, "K") gives her the spoon, he can tell her (or not) about the fact that her spoon has been immortalized among these hollowed pages.

This is one of those pieces that almost "wasn't". If you have been following my blatherings you know that up to now virtually all of my Lovespoons have been carved from Basswood. This one is an exception in that was carved from a piece of cherry.

Originally, K" was hoping that I could carve it from Walnut because "L" and her husband (I think it is "C") really like dark wood. Well, I have turned walnut but as yet I have never attempted to carve it. Walnut seems pretty hard and I wasn't sure that I could pull it off. So, instead I suggested that I could power carve the spoon from cherry and just stain it walnut. That was a simple enough plan, or so it seemed. It is a shame that it was fraught with so many pitfalls.

Pitfall number 1 - Although I have done *some* power carving, I really don't consider myself to be skilled in the art and, in retrospect, barely up to the level that this pattern required. The intricate looping of the Celtic Knot exceeded my skill level. I *did* manage to pull it off, but I had to resort to a considerable amount of hand carving and sanding *cleanup*. Oh, and please don't spend a lot of time looking at the back, OK? Thanks! :-)

Pitfall number 2 - Even though I had previously ventured into the folly of applying stain to Basswood and had experienced the unevenness of color that technique produced, I had somehow convinced myself that the same was *not* true of cherry. After all, I thought, cherry is much harder and besides when was the last time you saw a piece of cherry furniture with uneven stain?

What I failed to understand was that the real problem with staining Basswood is not the porosity itself but the difference in porosity between end grain and side grain...and, as I was to discover, cherry is absolutely no different in this respect.

You don't see dramatic color variations in furniture because you see mostly side grain. The amount of end grain is minimal and often hidden from view. But carving, on the other hand, introduces all manners of grain patterns including an inordinate amount of end grain. When you apply stain, the end grain just sucks up the stain like a bunch of microscopic soda straws and that area turns dark.

I can hear you saying, "But, Tom, don't you know about the pre-stain conditioners made to solve that problem?" Yes, I do. In fact I have a can of the stuff in my shop. But I have not been overly impressed with its efficacy on Basswood and besides, as I just mentioned, I had already convinced myself that this wouldn't be a problem because I was using cherry.

The first coat went on dark...I mean really DARK! Particularly, in the knot and the bowl where, not co-incidently, there is a great quantity of end grain. After it dried, I re-sanded and managed to get a lot of the color out. Realizing that there was no turning back I applied a second heavier coat of the stain hoping that it would level out. Well, it did...a little... so here we are.

I sent some pictures to "K" via my sister, who is sort of coordinating this whole project. Since you're reading this, apparently he was pleased enough that the spoon will be given after all. I do hope that "L" and "C" enjoy their Lovespoon.

Don't expect to be reading anything more about using stain on carvings on this blog. I have sworn off stain, thank you very much. From now on, if I take on a carving project that requires a non-Basswood color that can't be obtained using simple, everyday opaque paint, then it will be carved out of wood that already is that color.

Epilog:

Chris Pye, a woodcarver from the UK with whom I can never hope to compare, always ends his newsletter with a section called, "One for the Bench" where he bestows a random piece of wisdom to consider while one's hands are otherwise engaged in carving.

That seems like such a good idea that I'm going o try to do the same thing here. My thoughts may not be as pithy as Chris's but I'll try to be insightful or at least humorous. So here goes...

One for the Bench (The first one):

KNOWLEDGE is knowing that a tomato is a fruit; but WISDOM is not including a tomato in a fruit salad.

"Til next time, keep makin' chip and leave the staining to furniture makers:-)

Friday, August 27, 2010

A Ball and a Glove


Now I must say that I’m not much of a sports fan, but the next piece – yet another “oldie” – is one of my favorites.  I don’t have much to say about the carving itself.  It is about 1/4 scale, carved from Basswood (what else?) and finished with 3 or 4 coats of sanding sealer (sanded with 220 between coats) followed by a hard paste wax. I think turned out rather well, even if I do say so myself.  But I think that the story behind the carving is kind of interesting, so here goes:

I carved the Ball and Glove for my brother-in-law.  I’ll call him “B”.  “B” is sort of my opposite number.  He has always excelled in sports, basketball and Baseball in particular…me…uhhhh…not so much.  Family pressures many years ago denied him the chance to try it for real after the Pittsburgh Pirates scouted him.  Would he have made it?  We’ll never know for sure, but I think he probably had a pretty good shot at it.

Shoot ahead 35 years or so, his kids are grown and out of the house and the Pirates begin offering a Fantasy Baseball camp where for a not insignificant sum of money you can spend a week in Florida (right before spring training) and get to play real baseball under the tutelage of former Pirate players and coaches.  “B” signed up, did quite well and over the course of the next 10 or 11 years got to play in both Three Rivers Stadium (before they tore it down) and PNC Park.  He knows, and is known by, more former Pirates than anyone else I know.

Now, getting back to the carving.  The number “27” popped up many times in "B's" life.  It was part of his street address in several houses that he and my sister lived in, their zip code, phone numbers and probably some other places, too.  So it was natural that given the chance to pick the number for his uniform he chose “27”.

“But the base of the carving has a “4” on it”, you say.  OK, I’m getting to that.  After about his 3rd or 4th season at fantasy camp, “B” switched his number from “27” to “4” in honor of Ralph Kiner famous for, among other things, hitting a home run in Forbes Field that can be seen in the 1951 film, Angels in the Outfield.   

As a kid in the ‘50s, “B” spent many a happy Saturday afternoon in the bleachers of Forbes Field in Oakland (also now torn down) as a loyal member of the Knot Hole Club (remember that?).  He idealized Ralph Kiner who he still describes as “A Home Run Hitter and a positive role model for other players…and by extension “Knot Holers”, too.”

The Ball and Glove was carved for “B” for his birthday in 2005, soon after he made the number switch.

‘Til next time, keep makin’ chips!

Thursday, August 26, 2010

The Sun and the Moon


I’m still vamping waiting for the time that I can post a few of the specials that I have been working on.    So, I’ve been strolling down memory lane -- more specifically through my photo file -- looking for other carvings that I think that people might like to see.

Here are a couple of pieces that I did some time ago for my nearly 4-year old Grandson, Henry's, bedroom wall.

The Sun is and original design and is about 8” across.  The Man in the Moon (I’ve done a couple of these) is a little larger and is based on a picture I found out on the web someplace.  As usual, they are both carved out of Basswood.

I hope you like them and soon I’ve have some new stuff to show…I promise!

“Til next time, keep makin’ chips!

Friday, August 20, 2010

My Second Navitity Set


Here’s a second, more abbreviated, Nativity Set that I carved about three years ago for a charity auction. 

While it consists of only three figures, each is quite a bit larger its counterpart in the original set: about 9-1/2” versus 6-1/2” tall.  Otherwise, the figures are nearly identical.

In this piece, the base is actually notable.  It is turned from a piece of nearly 100 year old wormy chestnut that spent about half of its life as a shelf in the storeroom of an industrial building here in Pittsburgh.  When the building was demolished in the 1980s, my current boss rescued a couple pickup truck loads of this highly desirable wood.  And now he has made some of his stash available to me.  Thanks, John!

'Til next time, keep makin' chips

Thursday, August 19, 2010

My First Nativity Set


It's been a while since I have posted anything.  I vowed that I wouldn't do that, but things have been kind of busy here with two business trips almost back-to-back.  I *do* have a couple things that I *could* post now, but because they are gifts I can't disclose their existence yet.  But I will post them as soon as I can.

In the meantime, I have a few older things that I have yet to post.  I carved the nativity scene pictured here for my daughter and her family about 5 years ago. (The color in the overall shot is much too red.  The basswood looks much more like the individual pieces below.) I carved most of it the first year and then added a few fill-in pieces (the sheep, Ox, camel and stable) over the course of the next year or two.

All of the pieces shown are my original design.  Early on I was photographing my figures with a mirror so that you could look at two sides at once, as below.  


The manger is carved with two inset pieces, one with just the hay and one with the Babe in the hay.  That way, Baby Jesus doesn't arrive until Christmas Eve.


I hope you like it.  If you do please feel free to comment.

'Til next time, Keep makin' chips

Thursday, July 1, 2010

Dancing with the Stars…er…I mean, Spoons


Believe it or not, I actually *did* come up with this idea on my own.  Although, I *do* have to admit I was *greatly* influenced by an image that I found during one of my many -- Yeah, you guessed it -- Google Image searches. 

The image I found looked like it was probably a single cartoon film cell (no, I don't know who did it.  In fact I don't seem to be able even *find* it again) showing two elaborately decorated spoons positioned on a dance floor in a rather typical “Dancing with the Stars” dip position.

I wanted to come up with something new and different to have as a table decoration at this year’s Christmas Craft show and I think I finally found it.  I have no real desire to sell it -- its real purpose is to generate customer interest -- so I’ll have it there with a ridiculously high price tag on it.  But, of course, in the event that somebody *really* likes it and isn’t driven off by the price, I may have a tough decision to make. :-)

This was one of those projects that I wasn’t positive that I was going to able to pull off until it was almost done.  After I drew up and carved the spoons, I drilled a small hole the tip of each of the bowls and glued in a dowel rod into each one for support.  But until I temporarily slipped these dowel rods into holes in a piece of scrap wood and held one spoon against the other, I still didn’t know exactly how, or even *if*, they would fit together. 

When I carved the “man spoon”, I left a little extra *meat* on his right hand.  Holding the two spoons together with one hand, I scribed the arc that was required to accept the “lady spoon’s” right shoulder with my other.  I carefully scooped out this area in “his” hand (*repeatedly* checking the fit, believe me!) to accept “her” shoulder. 

Once they seemed fit together the way I wanted, I shaped the rest of his hand and veeeeeeeery carefully drilled a hole through “his” hand (from the rear) into “her” shoulder, taking great care *not* to punch all the way through.  I then glued a small piece of dowel rod into “her” shoulder to hold them together during final assembly.

I cut a sort of semi-randomly shaped piece of cherry to use for the base (it seemed to me that symmetry would not work well here) and carefully transferred the mounting holes making sure that their spacing and angles exactly matched those in the scrap wood base. 

Much sanding and finishing later, I glued the spoons to each other and to the base. I added supports and rubber bands to hold everything steady, carefully mopped up all of the glue drips and went off to bed hoping that everything would actually hang together.  I spent much of time before sleep finally overtook me imagining how and where I would add all of the small gusset plates that I *just knew* I would need to hold things together when the glue wasn’t enough. 

Fortunately, while I slept, my faithful and resourceful magic wood glue fairies did a good job to make everything marvelously solid.  Even so, I still intend to handle it with kid gloves. :-)

The only thing left to add is a small, engraved brass plate on the sloped area on the left side.

‘Til next time, Keep makin’ chips.

Sunday, May 30, 2010

Yet Another Lettered Lovespoon


Here is a Lettered Lovespoon that I just completed for a young couple who is getting married in late June.  Like most of my other Lovespoons, it is an original design carved from the traditional Lovespoon material, Basswood.

I try to follow a couple of personal “design rules” when I’m commissioned to carve a Lettered Lovespoon.  There’s no real good reason for these rules, you understand, they’re just my rules. 

Rule #1: The Lady’s initial goes on top, the Gentleman’s on the bottom.

Rule #2: The letters are *always* linked together.  Come on, this *is* a Lovespoon after all and a couple should be…well…linked together like the letters.

The letters always have a way of telling me how *they* want to displayed on the spoon.  Because the grain of the wood runs the length of the spoon, wide letters, like the “R” in this case, are often a problem in that they need a lot of extra support to keep their ends from just snapping off, either during the carving process or handling before the spoon is hung on the wall.  I took advantage of the width of the heart-shaped bowl to provide support for the “R”.
Having said that, however, because the tips of the “S” and the “R” stick out with very little “meat” to anchor them, the spoon will be best served hung well out of plate-throwing range.  :--)

When I attempted to hook the “S” into the “R” (per my rules), the arrangement just didn’t work for me visually because everything seemed to be squashed together at the bottom of the spoon leaving the top of the handle looking more than just a bit little naked. 

After some playing around on paper, I finally decided to include a set of interlocked wedding rings between the two initials.  Wedding rings are a common Lovespoon adornment but not one I had used before.  Using the rings -- locked into the “R” and into the “S” -- allowed me to slide the “S” up the handle for a more balanced look.  Everything is still interlocked so in my mind, at least, I haven’t violated my design rules.

I am pleased that I was able to make the handle disappear behind the two rings without jeopardizing the overall structural integrity of the spoon.

As soon as I began carving, I realized how much right-over-left-over-right-over-left there was going on around the rings.  This was a tough spoon to carve!  In retrospect, I think that I should have spread everything out just a bit more. 

A long time ago I started using Sanding Sealer rather than varnish or shellac on spoons, because IMHO, it seems to make a harder finish and, in the case of the basswood, adds some color.  I used 3 coats of sealer (sanding with 220 sandpaper between coats) followed by buffing with #0000 steel wool and a good coat of paste wax.  The finish came out wonderfully smooth.

My spoon and my best wishes go out to the soon to be “Mr. and Mrs.”!

'Til next time...Keep makin' Chips

Thursday, May 13, 2010

New Ventures


I am getting ready to embark on a new venture…well, really TWO new ventures. 

Venture #1: 

If you look back through my postings about a year, you will see that I carved what I feel is a “more than passable” wooden replica of an 1884, Springfield 45-70 “Trapdoor” Rifle. It is hanging on the wall in the family room but for some time I have thought that I’d like to make some sort of a companion piece for it.  What I *didn’t* want to carve was a duplicate of the Colt Peacemaker cap gun carried by every young Buckaroo of the wild and wooly 1950s, myself included.

 So after much searching, I have finally selected my victim…err, I mean subject…to carve.  A Remington 1861 Cap and Ball Revolver. 


 Loyal readers…and I think/hope I have a couple… know that I spend a lot of time “Googling around” looking for images that I think will make good carvings.  As it turns out, the 1861 Remington is a *very* popular firearm among collectors and the web is just loaded with resulting really good photos to use as a “Go Bys”.  This shot is typical. 

The major problem is getting scaling information.  But some collectors have graciously agreed to make and send the critical measurements to me.  Given these “benchmarks”, I think I can just scale everything else off the photos.

As you might surmise, woodcarvings *look* nice but they are *amazingly* fragile.  So to avoid having to tell grandchildren…and not just a few adults:-)…not to handle the gun, I plan to display the gun in a box with a glass cover.  You can look but you can’t touch! 

My original thought was to make a pristine, velvet-lined walnut *presentation* style case -- but after seeing this picture, I think that the *well used* carrying case, complete with oil-stained and tattered instruction sheet seems much more appropriate.  So that is what I am going to do.  Note: the revolver in the case is a Colt of about the same vintage.  It is nice, but I think that the Remington is “Waaaay Cooler”.


Venture #2

I am going to try to make this an "interactive"…if that is the right word…project.  Unlike the rifle, I’m going to try to take interim photos and I intend to post periodic updates on the progress.   That is my story and I’m stickin’ to it.

‘Til next time…Keep Makin’ Chips